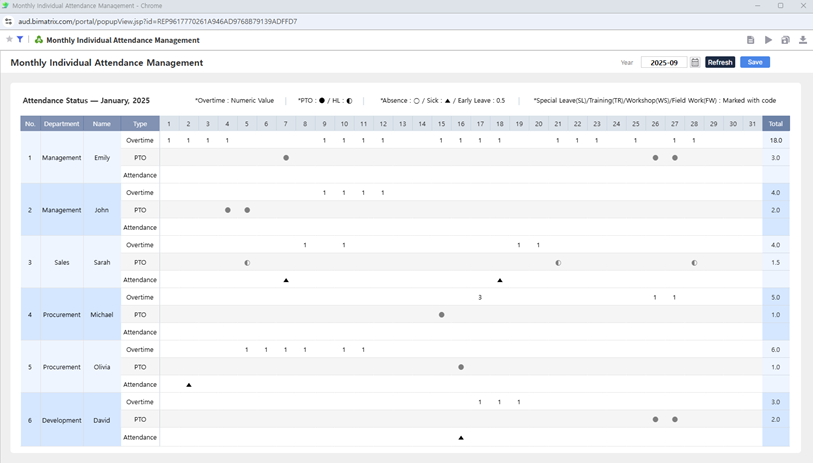
This report provides real-time consolidation and management of employee monthly attendance records by department.
Move away from Excel-based tracking and manage all attendance data directly on the web.
Quickly review attendance details for each employee on selected dates, allowing central administrators to monitor overall status instantly and accurately.
Use the provided sample Excel file to experience a more efficient way to manage attendance records.
Step 1. Convert an Excel file to a web report using i-AUD Designer
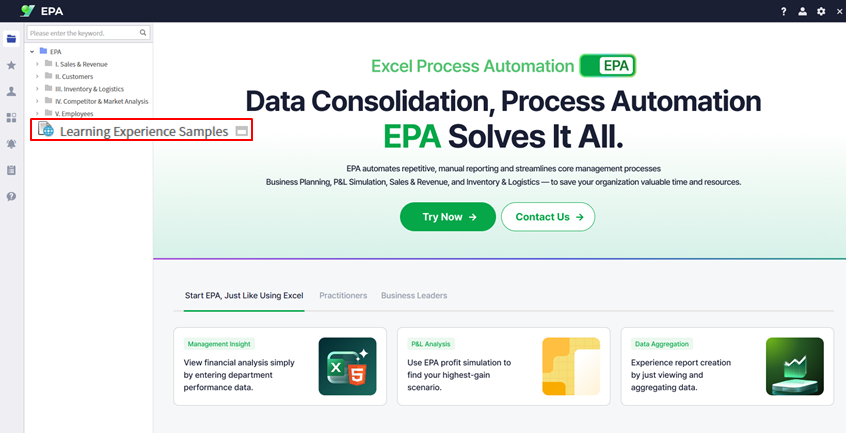
Download the sample Excel file from the Learning Experience Samples.
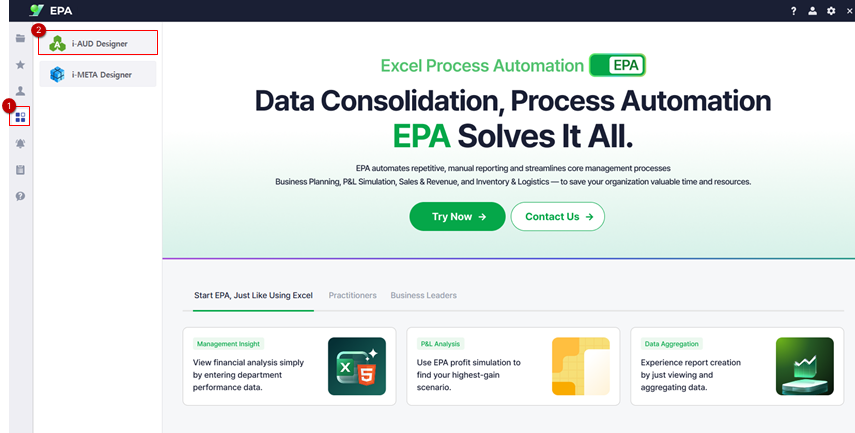
From the EPA main screen, go to [Menu] > [Tool] and launch i-AUD Designer.
Drag and drop the saved Excel file into the i-AUD Designer window.
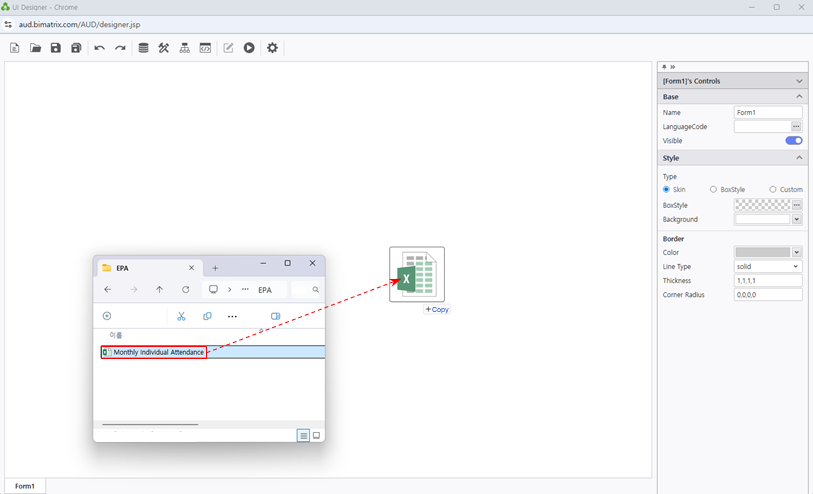
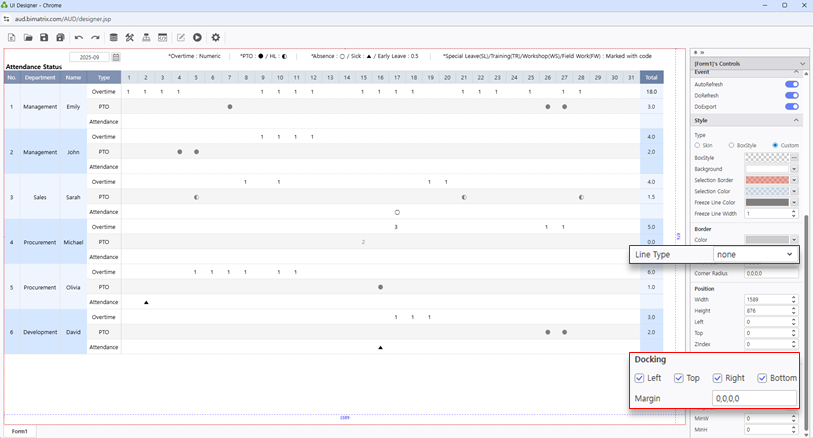
Ensure the report automatically resizes to fit the web browser window.
In the Properties pane on the right, check Docking: Left, Top, Right, Bottom.
To remove the border from the report on the designer screen, set the Line Type property under Border to ‘None’.
When database data is connected, the number of records displayed on the web screen is limited to 1,000 by default. You can adjust the limit to display as many records as you need.
Data > LimitofBinding : 5000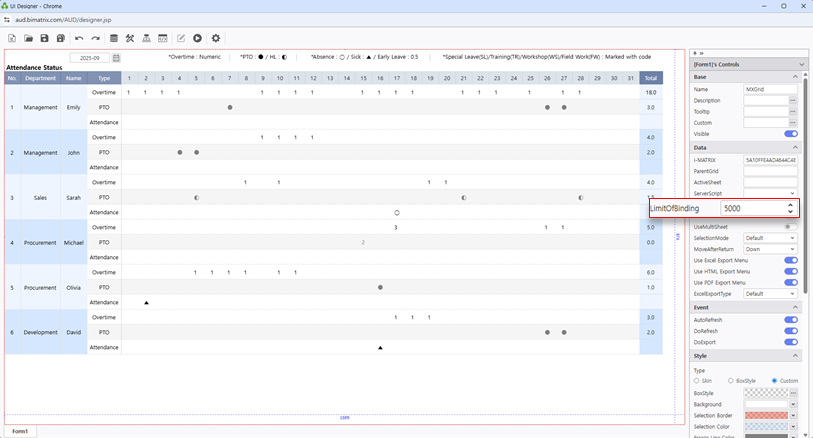
Step 2. Configure the data input screen
Using Excel’s ‘Name Manager’ and the UI Bot, set up the report so that data can be entered directly on the web.
Right-click on the report area, then select Design.
Naming Rules for the Data Input Screen
To configure the data input screen, you must follow these three rules:
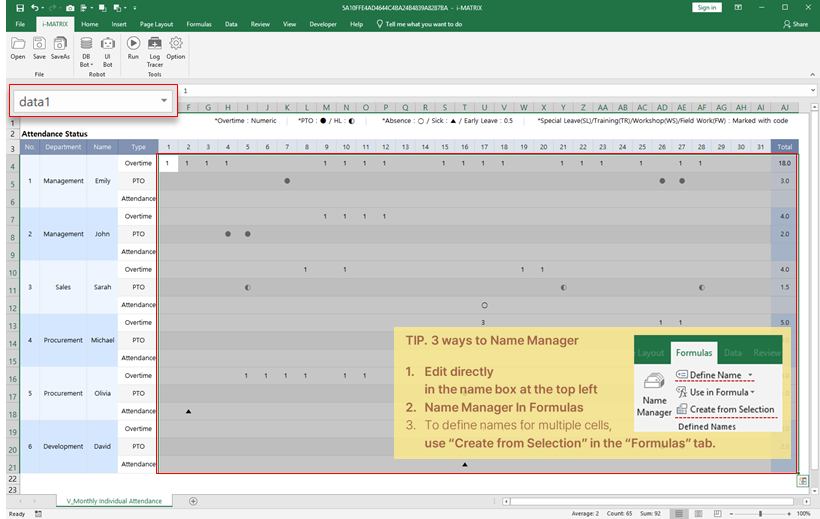
Name the data entry area “data1”.
Set the cell format to ‘Number’ for numeric input and ‘Text’ for text input.Name the table area to be aggregated “table1”.
In the top-left corner of the area defined as table1, you must enter the table name.
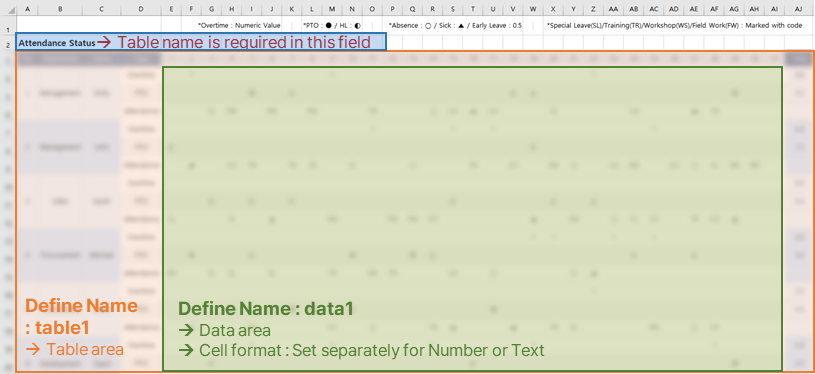
According to the rules, select the area on the sheet where data will be entered and name it “data1”.
Select the entire table form to be aggregated and name it “table1”.
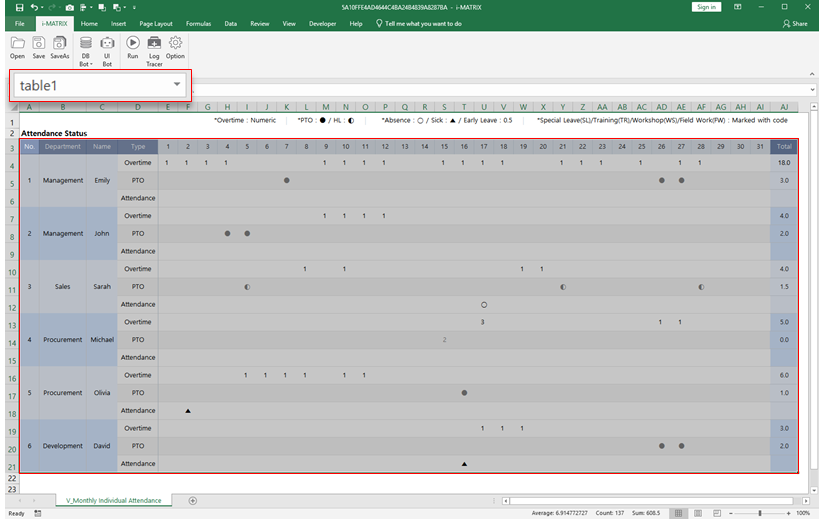
- In the top-left corner of the area defined as table1, enter the table name.
- The setup for web data entry is now complete.
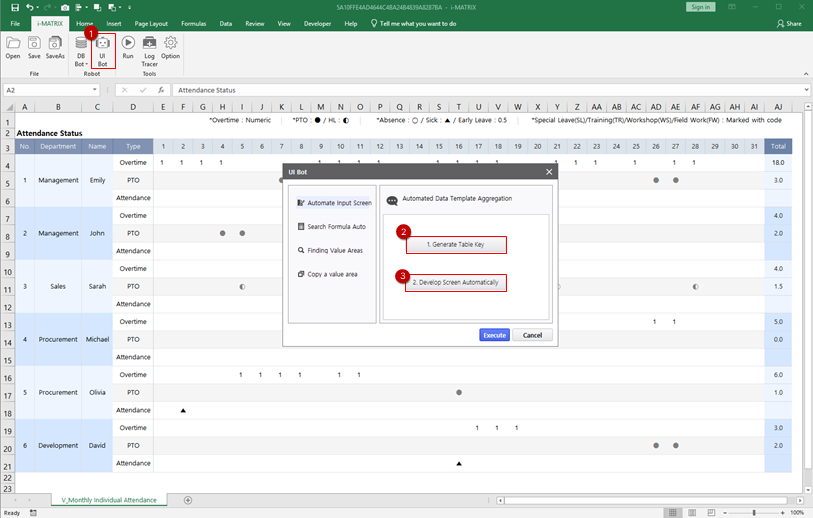
Next, we will configure the report so that data can be entered and saved with a click, and the saved data can be retrieved. Go to the ‘i-MATRIX’ tab in the ribbon and click 'UI Bot’.
Set up a date variable to input and save data by month, and configure the table name to update automatically each month.
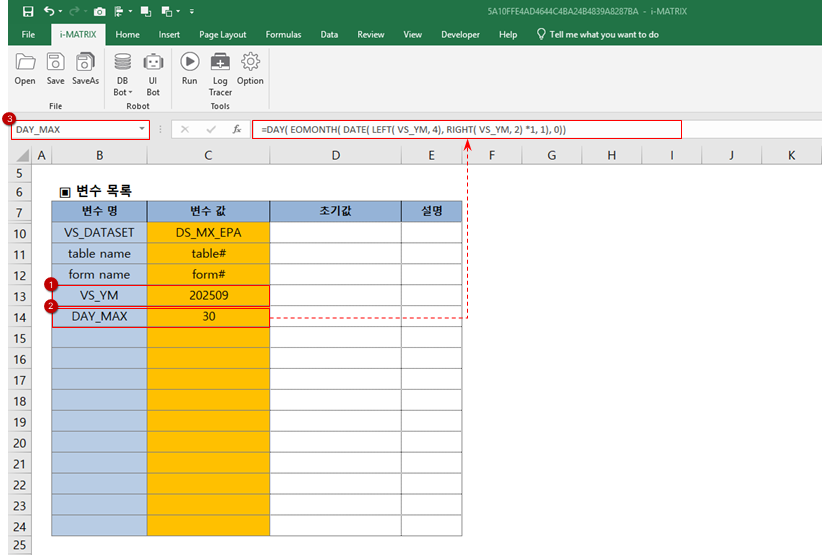
- In the P1 sheet, define a name for the date variable, VS_YM, and enter the desired year and month as its value.
- To make the screen dynamically adjust to the number of days in the selected month, calculate the maximum number of days using the formula below.
Formula : =DAY( EOMONTH( DATE( LEFT( VS_YM, 4), RIGHT( VS_YM, 2) *1, 1), 0)) - Then, define the calculated value as DAY_MAX.
- Next, go to the V1 sheet and enter formulas so that the displayed dates and report title change based on the selected month.
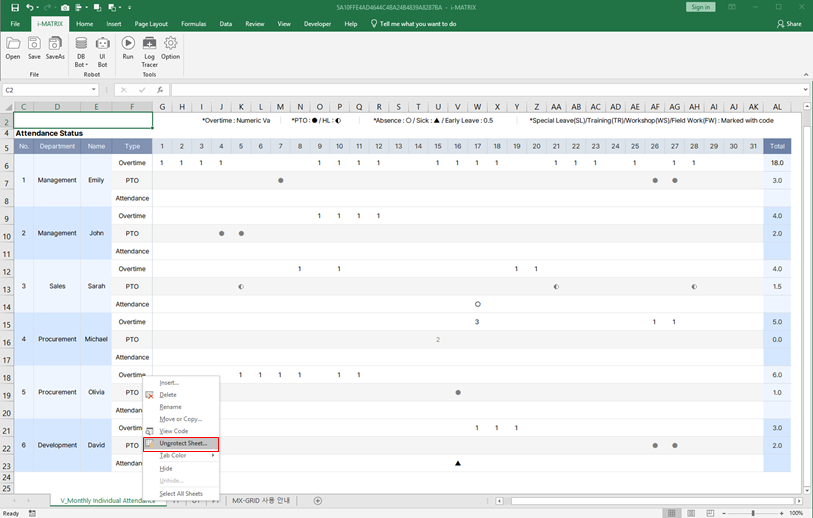
- Note that when the EPA module runs, sheet protection is automatically enabled — disable it before editing, and re-enable it afterward to allow web-based data entry.
- To hide unused date columns (e.g., 28th-31st) based on the selected month, use the AUD-specific formula below, referencing DAY_MAX defined in the P1 sheet.
Formula : =AUD_HIDE_COLUMNS( IF( AH6 > DAY_MAX, TRUE))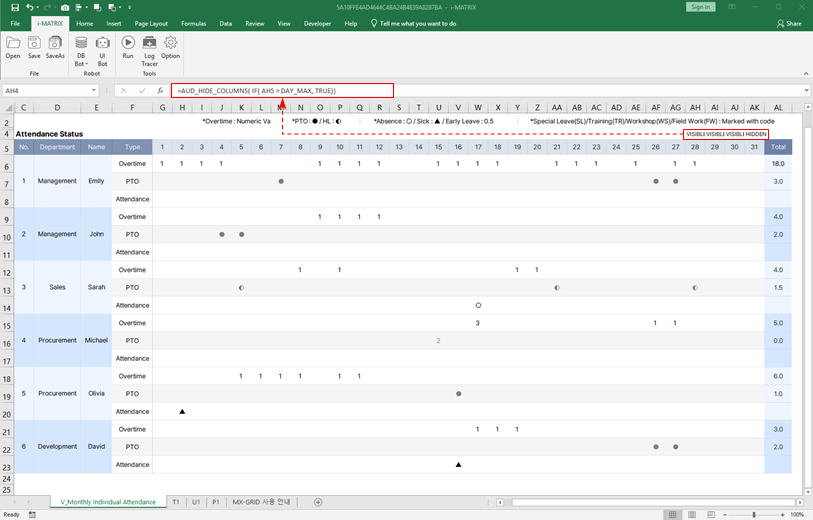
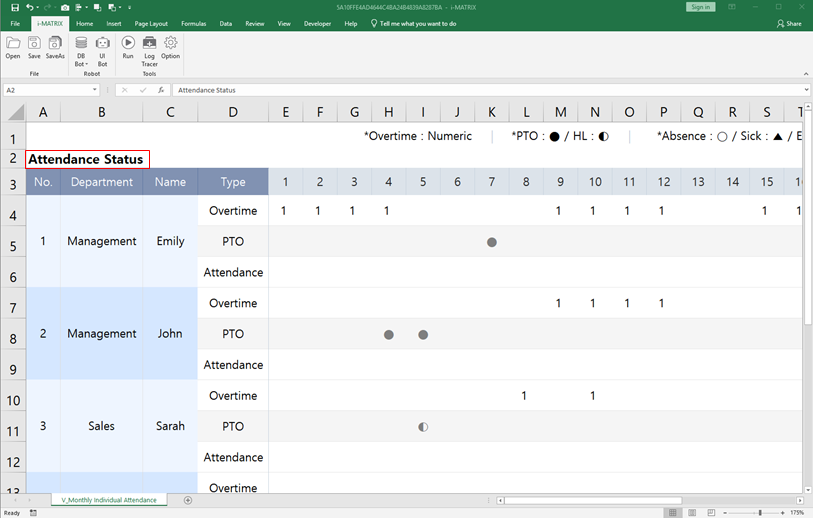
- To dynamically update the report title by selected month, enter the following formula in the title area.
Formula : = "Attendance Status ─" & TEXT(DATE(1,RIGHT( VS_YM, 2) * 1,1),"mmmm") & ", " & LEFT(VS_YM, 4)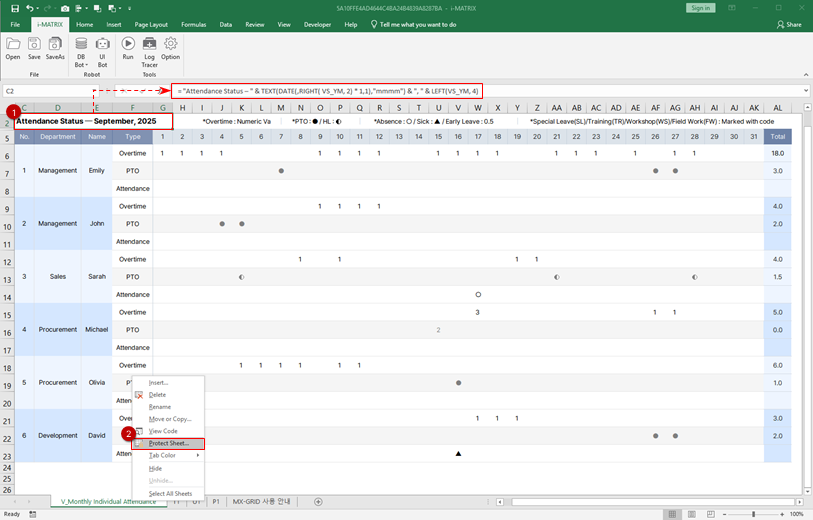
- Hide any rows that should not appear on the screen, re-enable sheet protection.
- Save the Excel file, and return to the web screen.
Step 3. Connect to the DB for data storage and configure buttons
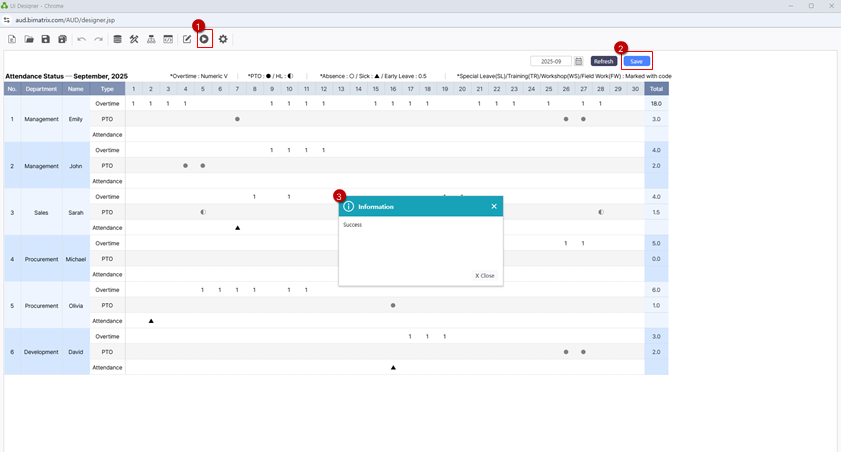
In AUD Designer, double-click an empty cell in the data area and enter a number. Verify that the value is entered and totals are calculated automatically.
- To save the entered data to the database, connect to the DB and configure the Save and Refresh buttons.
- Go to DB Bot > DB Upload and register an execution plan.
- 'Enter the ‘Table Name’ and select the ‘Data Control’ containing the data to be saved. Then, columns will be automatically mapped.
- Set ‘Execution Type’ to ‘Merge’.
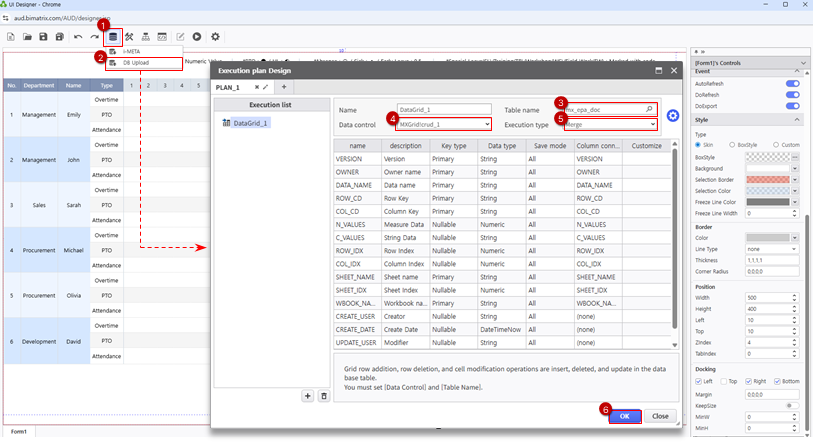
- The setup for saving data to DB is complete.
- Now, let's save the entered data to the DB and set up a button to retrieve the saved data.
- Place a calendar component that allows users to select date conditions such as year and month.
- Got to UI Bot > Calendar and click Month.
To ensure that data is saved using the selected date from the calendar in AUD Designer, set the component’s name and initial date as follows:
Name : VS_YM
InitDate : 202509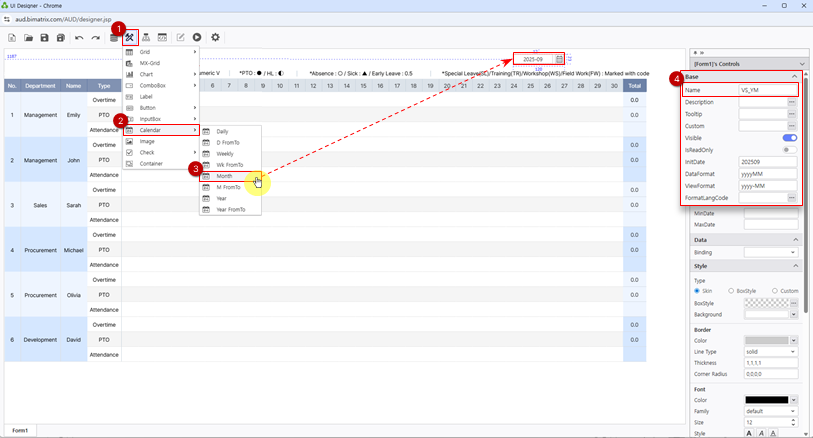
InitDate Reserved Keywords
 The InitDate property defines the calendar’s initial value.
Number
Specify a date in numeric format such as:
20230101 or 2023-01-01NOW Function
Use NOW() to set the current date as the default.
DATE Function
DATE(0,0,0) = NOW()
The arguments represent DATE(year, month, day), and you can adjust them relative to the current date.
Example) To set the date to one year before the current date
: DATE(-1,0,0)
DATE Function Reserved Words : F and L
F(FIRST) : 1900(year), 1(month), 1(day)
L(Last) : 2999(year), 12(month), the last day of the selected month(28th~31st)
Examples) To set the first day of the current year
: DATE(0,F,F)
To set the last day of the current year
: DATE(0,0,L)
FromTo Calendar InitDate
When using a From-To calendar, separate the start and end dates with a semicolon(;).
Example) DATE(-1,0,0);NOW()
- Add two buttons from UI Bot > Button and place them in appropriate positions.
- Rename the buttons to distinguish their functions.
'Save' : BTN_SAVE
'Refresh' : BTN_REFRESH
Use Process Bot to assign actions to the buttons.
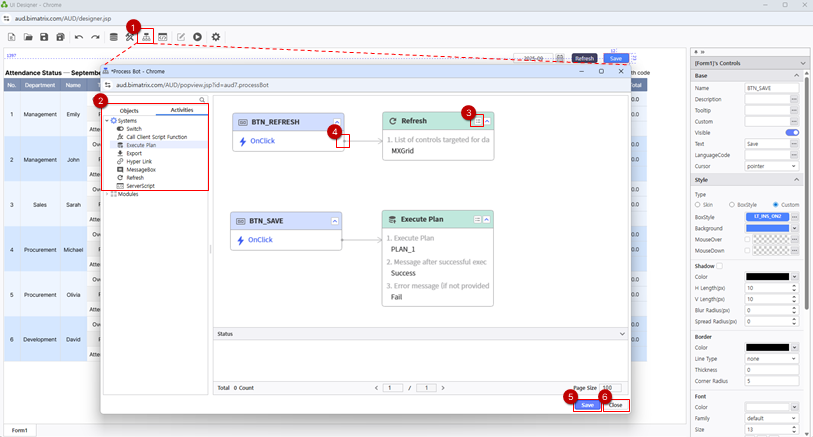
- Once this is set up, entering data and clicking the ‘Save’ button will store the data in the database, and the 'Refresh' button will fetch the stored data.
Step 4. Save your report
- Save the completed report to My Folder.
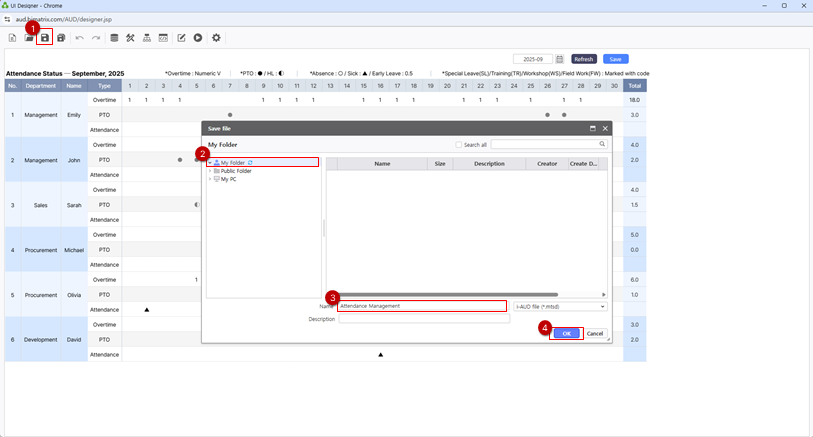
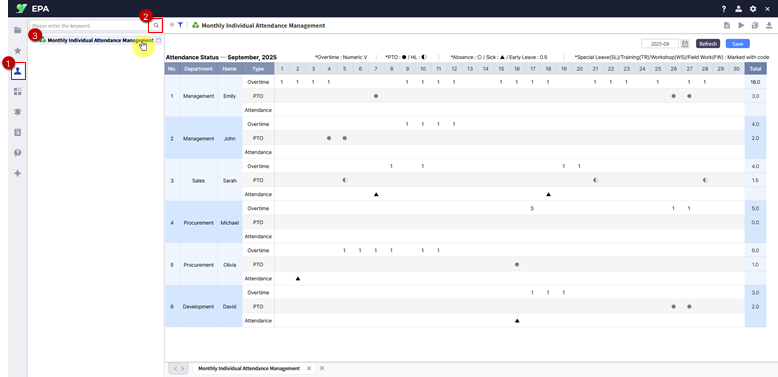
From the EPA main screen, go to [Menu] > [Individual] in the left-hand sidebar.
Click the Search(Magnifying glass icon) button to refresh the report list and confirm your saved report.
Enter data on the web and save it to share with your team.
- Save the completed report to My Folder.